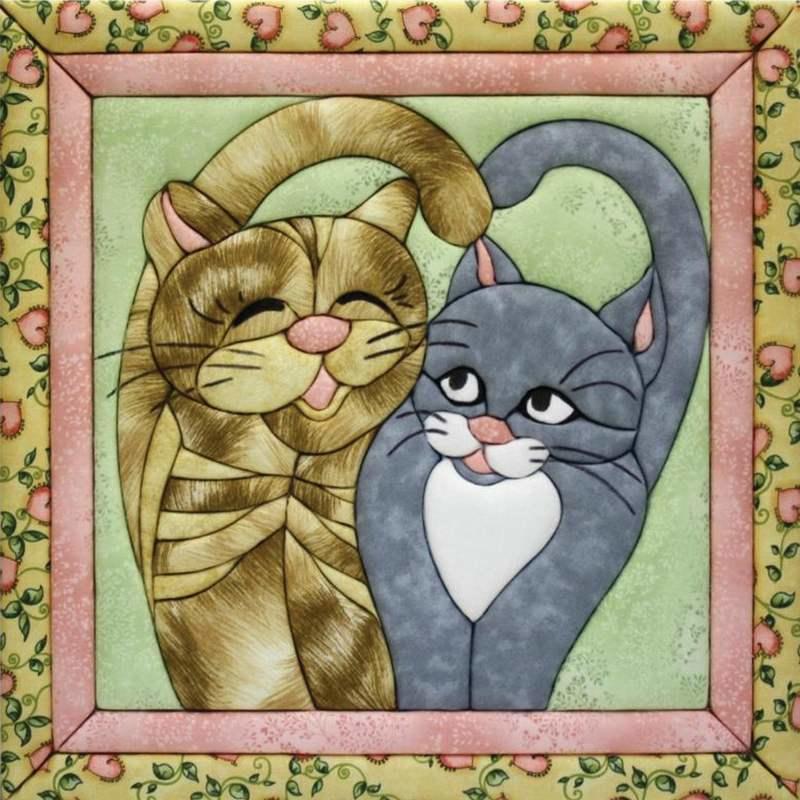
How to make stylish paintings for your kitchen interior using scrap materials with your own hands. Original paintings made from toilet paper with your own hands: master classes, photos, videos Making paintings using different techniques
Not every person decides to hang beautiful paintings in their own kitchen. And this despite the fact that designers highly recommend decorating the kitchen with your own hands. After all, they will be able to bring something new and unusual to this room. DIY kitchen paintings are considered a new trend in transforming rooms.
If you want to decorate your kitchen with paintings, then first of all you will need inspiration. But how to find it?
The search for new ideas for inspiration should be drawn from everywhere. Don’t discard even those that initially seem too simple and banal. They may end up being exactly what you need.
Also accumulate vivid impressions. Find some nice box and put in it all those interesting things that you hope to later decorate your kitchen with.
Realize your potential in new genres. To create something interesting, you need to try new ideas.
Coffee and seasonings for paintings for the kitchen
Making a canvas with your own hands is quite simple. For this you only need certain tools and materials:
- various cereals;
- cardboard;
- glue;
- beans;
- Bay leaf;
- coffee beans;
- thick fabric;
- cinnamon bark.


Making canvas for a painting
First you need to prepare the cardboard. You will need to cut a rectangle or square from it. It depends on how you want the picture to look.
After this, the resulting blank is traced over the fabric, an allowance of five centimeters is made and cut out.
Next, you need to place cardboard on the fabric, cut off the corners of the fabric and glue it to the cardboard. To prevent the fabric from unraveling, its corners will need to be glued with special care. You pull the burlap onto the cardboard very tightly with your own hands.

Drawing for a painting
If you did everything written above with your own hands, then you should have a canvas. Now you need to make a drawing by laying out coffee beans and cereals on the canvas. What the picture for the kitchen will be like depends solely on personal imagination. The material can be laid out either loosely or tightly.
After you have designed the pattern, you need to glue all the elements of the picture. You can use regular glue, but it’s best to find a silicone gun with your own hands, since with its help gluing occurs much faster.
At this point, the process of making this painting can be considered complete.
Paintings from cereals and seeds (video)
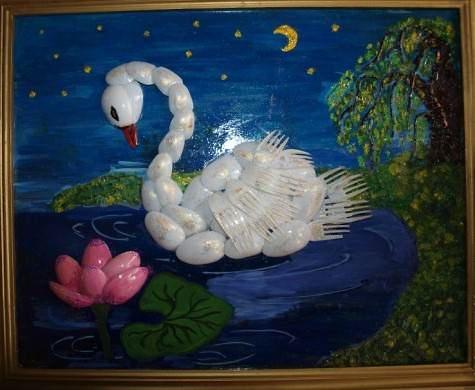
Crafts from cutlery for the kitchen
In this case we will not talk about standard paintings for kitchens, but more about the panel.
Paintings from buttons and plates
The more buttons, the much better. They will be the basis for the paintings. They will need to be sewn onto thick fabric. After that, they are inserted into the frame and glued with glue. Interesting plates are hung in the center and on the sides and painted with acrylic paints. The masterpiece is ready!
Pictures of spoons and forks
You can also sew forks and metal spoons onto thick fabric. They will need to be painted with enamel, after which you will get a wonderful still life.
Their plastic materials can make more interesting pictures in the kitchen. Plastic forks and spoons are easy to paint and can be glued to any surface.


Cross-stitch
With the help of cross stitch you can create incredibly beautiful pictures for the kitchen. Such paintings are considered simply stunning decor for this room. All drawings and pictures can be made from:
- various products;
- colors;
- dishes.
You may not have paid attention to many items before. Now, thanks to the paintings, you will be able to feel all their beauty and charm. In order to make such a picture with your own hands, The following materials and tools are needed:
- fabric (canvas is best);
- two scissors (large and small);
- threads (preferably floss);
- marker for marking;
- special warmed needle;
- hoop (suitable various forms, sizes and from any materials).
All these materials are most often included in a general embroidery kit.
Available materials
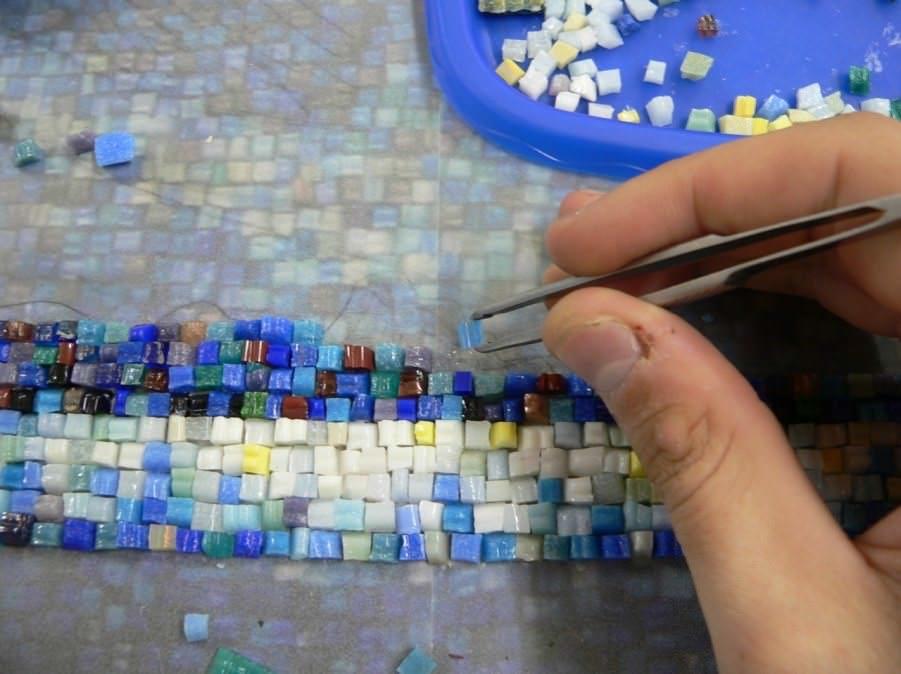
Mosaic
Mosaic opens up great scope for the implementation of creative ideas for the kitchen. You can make paintings in the form of a mosaic from the following materials:
- glass;
- eggshell;
- broken tiles;
- rhinestone
Using the instructions below, you can easily do mosaic painting:
- cardboard of the required size is taken as a basis;
- glue is applied to it;
- put all the necessary elements on it;
- To fix small details, the product is coated with varnish.
Installations
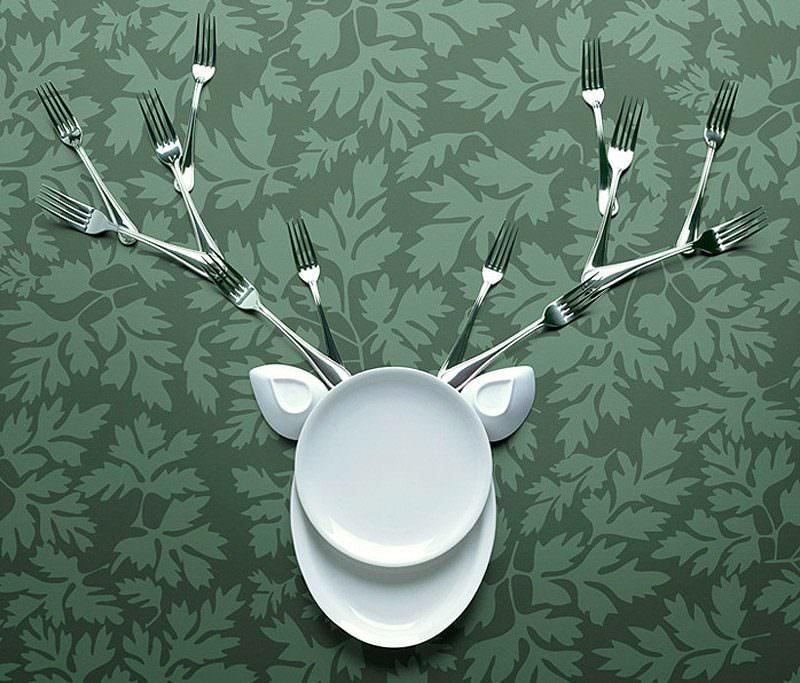
In making paintings with your own hands for the kitchen, you can use completely non-standard methods. The most incredible paintings are created using ordinary household items. For example, thanks to ordinary knives and other objects, you can create an incredible composition. Therefore for this you need materials such as:
- A4 photo frame;
- glue;
- ruler;
- pencil;
- scissors;
- cutlery in the form of a knife and other utensils;
- pieces of fabric.
DIY flower painting
The essence of this picture is to collect dried flowers. It's absolutely easy to make. Such flowers can be bought at any specialized store.
We take the base and glue the flowers with glue. Leaves and petals are drawn using pencils and felt-tip pens. If desired, you can even glue dried grass.

Leather painting for the kitchen
In this case, both suede and real leather are suitable. Its pieces are combined with paints, fabric and other materials. The most important thing is that with any such combination the picture will look amazing.
Paper painting
Unfortunately, this picture will not last long. But very beautiful. You can make both origami and quilling. Basically, such masterpieces are made by children, for whom the manufacturing process brings a lot of pleasure.
Paper painting (video)
Decorating with posters
Posters are large images that can convey someone's image or idea. Black and white posters are considered the ancestor of posters.
Exists several types of posters:
- depicted on canvas;
- printed on paper that imitates canvas;
- printed on photo paper
Making them for the kitchen is absolutely easy. All you have to do is find the image you need.

Foam painting for the kitchen
A lot of foam blocks remain after purchasing various household appliances. Many people throw it away, and do it completely in vain. After all, if you get creative, you can use it to make a kind of picture for the kitchen.
Initially, you will need to prepare some image. It will need to be glued to the surface of the foam. The sides of the block are also covered with paper of the desired color. To hang the resulting picture in the kitchen, all you need to do is attach a small loop to the back of it.
Master class on making a picture frame (video)
Conclusion
You read in this article about the main types of paintings that you can make with your own hands. As you may have noticed, there is nothing complicated in creating them. So feel free to start experimenting!
Paintings for the kitchen (photo)


People began to paint beautiful pictures at the dawn of humanity. And if in ancient times, drawing pictures was a way to convey some messages to other people, then later their purpose changed. Gradually, they began to draw pictures for pleasure and began to decorate their homes with them. An art such as painting arose, which spread everywhere and became popular. The method of decorating a room with the help of paintings has been preserved to this day.

Everyone knows that beautiful images can transform a room, make it cozier and more attractive. Of course, in our age there are many design solutions, but none of them compares with beautiful picture, which you can also make yourself. It is not necessary to have talent to create a magnificent image; all you need is desire and time to realize your idea.
Looking for inspiration
You shouldn’t take on the first project you come across and try to do it quickly. You risk getting unprofessional and sloppy work. This is the mistake of many. Give yourself time to think, look at a variety of ideas and photos. Decide what kind of picture you would like to see on your walls, let all the details gradually form into a single whole. Select only best ideas.
The whole process of work and the end result should seem clear to you, then you can create a masterpiece. It’s worth trying yourself in different genres, but it’s better to start with the most accessible one. If you have sewing skills, then try making a picture out of fabric. And if you have embroidery skills, then embroider something original. Once you've made one creation, you'll want more.

There are many ways to create a painting yourself - from the usual method using a piece of paper and paints to creating three-dimensional compositions using scrap materials. Let's consider the most interesting design solutions that will help you create paintings with your own hands and master classes.

Fabric paintings
Take beautiful fabrics and turn them into attractive, interesting pieces of furniture. Moreover, you can take both fabrics with an already drawn plot, and with an abstract design. From several of these drawings you can create an attractive composition. The main thing here is to combine the images in such a way that they create a pleasant impression.
Finally, you can simply embroider a picture and get a magnificent decoration. But first, of course, you will need to gain at least some needlework skills. If executed properly, such a picture can become a highlight that will add attractiveness to your home.

An interior painting made from various scarves looks no less attractive; this option is especially suitable for country or Provence style.
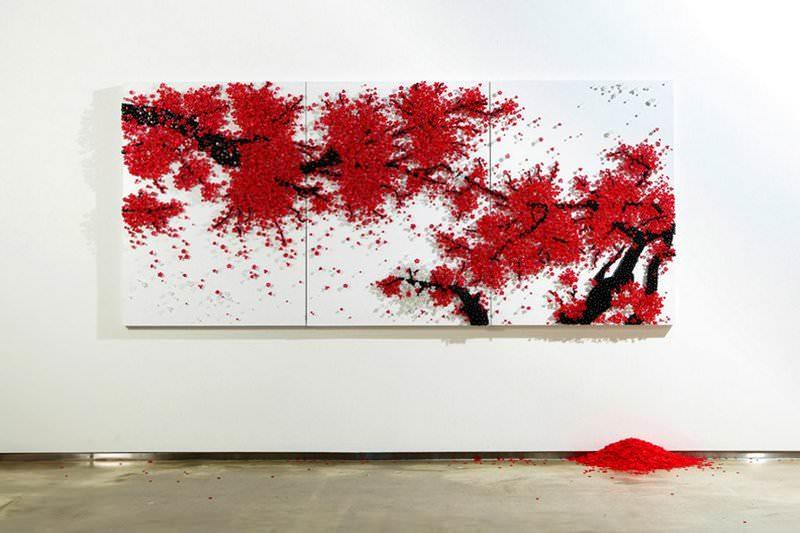
3D paintings
Using available materials, you can create three-dimensional paintings that will decorate the walls of your home. Absolutely any things can be used: dried flowers, colored paper, twine, wine bottle caps, pieces of fabric, leather, the imagination is limitless. Let's consider the simplest options.

Using colored paper
You can cut out absolutely any shapes from colored paper. You can even use a template for this. cut out beautiful flowers, butterflies, birds, stick them on a base - on canvas or a thick sheet of cardboard. Don't forget to create a beautiful composition. You can glue the figures onto the canvas using regular PVA glue. This way you will get an attractive paper picture, and its creation will not require any special skills from you.
Even simple wallpaper can be used. Surely, you will have scraps of a wide variety of wallpaper, from which you can put together the most different drawings. Use your imagination, you may be able to recreate a fairytale castle or hut on chicken legs using your material. Use scraps from different types wallpaper and you will get a bright, colorful image.
Attach your creation to a thick sheet of cardboard, frame it, hang it on the wall and enjoy the view. If the picture is intended for the kitchen, then you can insert a picture from the wallpaper into a candy box. Of course, take into account the color of the walls and the decor in the room; your creation should be combined and match the overall background.

If you want to draw attention to your creation, then hang it on a plain wall, in the very center. Everyone will immediately pay attention to the beauty of the drawing.
Twine
Anyone who has a wonderful artistic vision can create a picture from a simple string. To do this, the twine first needs to sell a certain shape. You can secure the shape using hot glue. Then several strings are placed on the wall in a certain order, creating an artistic picture.

From leather - master class
The picture on the wall made of leather looks original. But you can start creating this painting of flowers only if you have already gained enough experience in creating three-dimensional paintings. We present to you a master class that will help you create such a miracle for yourself at home.
First, prepare the frame and base, which will then be inserted into the frame. You will need leather material. Considering that such material is quite expensive, you can take an old leather coat and cut it into pieces. Don't forget to cook acrylic paints, scissors, knife, stapler, glue, paper sheet, chalk.
Let's look at the step-by-step description:
- Make paper templates of leaves and petals and cut them out.

- Cut out the details of the future painting from leather according to a pre-made template. You can hold the skin a little over the heat, which will make it appearance more attractive.

- Paint the parts with acrylic paints in the colors you want.

- Insert the base into the frame. This could be a simple piece of fabric that you will need to stretch, or use a simple sheet of plywood.

- Lay out the previously made leather parts on the base and evaluate how it will look. You can layer other details to enhance the composition. Use dried flowers, shells, twigs and other materials.

- Glue all the parts with glue.
- Hang a picture on the wall.

Thus, you can create any paintings from leather, which only your imagination is capable of.
Modular pictures
The most popular in interior design today are modular paintings. Their brightness is striking, they personify good taste and sophistication. In addition, they make any room attractive and hide its shortcomings. These paintings have one idea, but all their elements are corroded.
If desired, such modular paintings can be made with your own hands at home. The size and shape of modular paintings vary, so you need to choose one that suits your space. A modular painting should have 3 parts, but perhaps fewer or more.

Before you begin, you need to determine what will be depicted in the picture. Realistic landscapes look good and interesting places big city. You should not divide a human portrait into modules, it will not look attractive.
To create a modular painting, you don't have to paint it yourself. You just need to select any image from the Internet and print it on a printer. Then you just cut it into several pieces and hang it on the wall in such a disjointed form. For aesthetics, you can transfer the summer image to canvas or a sheet of cardboard.
Fragments of the picture can be placed each in a separate frame and hung on the wall. The basis for the models can be made of wood, chipboard, foam plastic and other materials. Modular paintings can be made on fabric and made up of various scraps.

Modular paintings look best on large spaces and concrete walls. Canvases of different sizes, as well as asymmetrical parts, look original. It is better to cover the surface of the painting with a protective varnish to protect it from dust and rapid abrasion.
Ideas for creating paintings
Many people find it quite difficult to decide what picture to draw and how to arrange the materials. In that case, you can consider the following best ideas and photos.
Blue abstraction. Take the following items: blue tulle or ribbons, scissors, cardboard or canvas, glue. Cut several pieces of blue tulle or ribbons and create an abstract painting from them. Glue onto the bases using glue. Work carefully so that the glue does not stain your drawing. You can then frame your creation and hang it on the wall.

Gold autumn. To make such a picture, you will need the following things: a base in the form of a piece of cardboard or plywood, plain fabric, acrylic paints, a brush, glue, a tree branch, and golden-colored aerosol paint.
Take the fabric and cover it with fabric. The fabric can be additionally painted with a single color paint, it is better to use blue. Prepare the branch. To make it easier to lay on the drawing, it is better to put something flat and heavy on it and hold it there for a while. Next, you will need to glue the twig to the canvas and spray the entire design with gold spray paint. Wait until your composition is completely dry and you can hang it on the wall.

Butterflies made of fabric. Cut out beautiful butterflies made of fabric and stick them on the wall using PVA glue. This type of decoration will liven up any monochromatic, boring wall.
You can lay out a beautiful composition using ordinary buttons of different colors. Glue them onto a canvas, insert them into a frame and decorate the wall of your home.
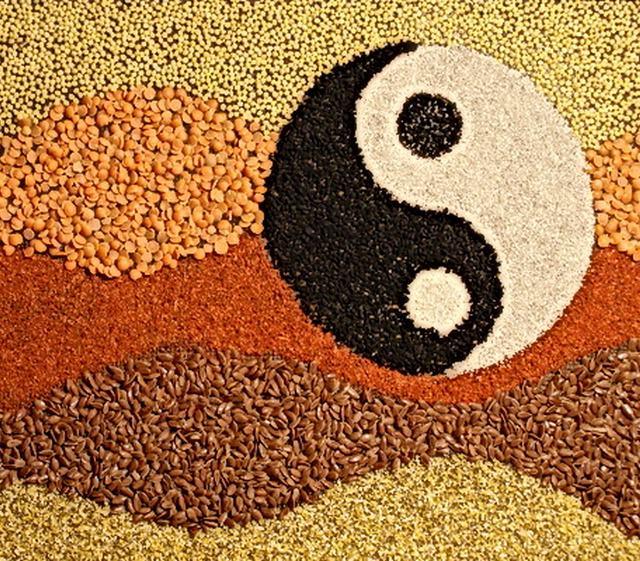
A picture made from coffee beans is perfect for the kitchen. You can make quite original drawings from this material. First you need to prepare a base from a sheet of acron and canvas, apply some kind of drawing on it, and then lay out this drawing coffee beans. To ensure that the coffee beans are firmly attached to the design, it is better to use a glue gun. Along with coffee beans, you can use other materials such as shells, pasta and other materials at hand.

Pictures can even be made from old newspapers. This option is great for retro style.
Make a lot of small pieces of paper painted the color of fish scales and make an original picture out of them.
Dried flowers are an excellent material for creating paintings. The main thing is to prepare a lot of material, but even if you did not have time to prepare it in the summer, you can use flowers that grow in your home. To create paintings with your own hands from flowers, you only need a canvas, a frame, double glass, but also, of course, dried flowers.
Use your imagination and any material at hand to create pictures. You can always create a masterpiece worthy of admiration, which will decorate the walls of your home and make it more comfortable.
Naturally developing as an art form, they have successfully reached the present day. At the same time, in modern designer interiors today it is almost impossible to find classical landscapes with still lifes: the place of pictorial classics has been taken by abstraction or highly artistic photography. It is with abstraction and modernism that interior painting is mainly associated, the task of which is to create a certain psychological background of the room, an appropriate mood for those present, as a rule, an atmosphere of peace and tranquility, or vice versa - office activity and energy.
The shift towards abstraction, it must be admitted, has brought painting much closer to to an ordinary person who is not involved in fine arts professionally or at a technically high level. Naturally, not everyone is able to realistically reproduce reality on canvas; with abstract art, anyone has more opportunities to create their own mini-masterpieces. There are a variety of techniques, sometimes you don’t even need a brush: you can come up with an original way of applying paint to a surface yourself, you just need to practice and gain experience. 

The main condition for independently creating a picturesque interior element can be called the courage of ideas and determination in their implementation: when creating artistic abstraction, it is extremely important to free the mind from limiting cliches and, with a light heart and a steady hand, produce strokes, strokes, colored stains on paper, giving free rein to inspiration and imagination . If you succeed, the creative process will turn into a kind of meditation, giving rest to your head and nervous system, distracting you from everyday worries and disturbing thoughts. 


In principle, any flat surface, smooth or with a relief texture, can serve as a working surface for a painting. It would be quite logical to take the first steps on ordinary thick paper of the required size; cardboard and plywood are also suitable, which can be pre-painted in the required light (or vice versa, dark) shade.
Making a three-dimensional painting with your own hands is a solution for extraordinary people who want to make their home decor individual and not stick to standard designs.
To create three-dimensional paintings for walls, a variety of materials are used, for example, a painting is made from plaster, you can create paintings from fabric with your own hands, create three-dimensional paintings on the wall from putty, make various abstractions or appliqués, create a bas-relief, use mosaics and much more. The list of drawings is large, it is important to choose the right image, and for this we use photos and videos from the Internet, which will help you decide on the artistic design and choose the technique of applying drawings to the walls.
Putty paintings
Do-it-yourself painting on the wall is often done using putty, but this option is not for lazy people, but when you manage to create a picture, it will look beautiful, and the cost is only the putty, you can use the rest after the repair.
It is not recommended to make from complex paintings, it is better to make a relief drawing from a simple image, learn how, and then move on to more complex paintings, this is the right plan. There is no need to sand the surface, so you can create a picture on the wall without dust. To work you need a spatula. Before making paintings from putty, preparation is carried out.
Preparing the base
Three-dimensional drawings are applied to plastered and smooth walls; if this is the case, then the surface is prepared as follows:
- The wall for treatment is covered with a primer.
- After drying, a background is made, choosing the desired colors, the putty is applied to the base with a spatula, and a roller is used to paint the base.
- Next, a picture is taken. Acrylic compositions dry quickly, which means that after a couple of hours a pattern is applied, for example, a landscape, a butterfly, a reed fruit. If the work is done by a master of art, then you can draw a stone city, spring, autumn, birds or nature.

You can transfer the drawing to the walls using a stencil, the main thing is not to select complex wall drawings, so that there are no difficulties with plastering. The paintings are medium in size. There are two options for applying plaster to the wall:
| Applying plaster: | Description: |
|---|---|
| Drawing with a spatula: | Using a pencil, lines are drawn on the wall, then a spatula is placed along the line and drawn along the drawing. Excess mixture is removed with a second spatula. When the contours are dry, paint can be applied to them. Similar instructions for the remaining lines on the wall. The three-dimensional picture is ready. |
| Draw through a syringe: | The needle is removed from the syringe and reinserted after filling with putty. Next, the composition is squeezed out along the contours on the wall. After the main drawing, you need to make the details of the picture. When everything is dry, paint is used, which is applied with a piece of cloth or a sponge. The recesses do not need to be painted. When the main color has dried, a second color is applied to the small details of the design, where a brush is used. |
The painting is made of a flower, a tree leaf and other drawings on the wall. If desired, you can use modeling, glue additional accessories, for example, make a frame using a baguette, use twine on the canvas, decorations in the form of kanzash, quilling, macrame and other decorations. If desired, you can use strips of wood, moldings and other ideas.

Photos of the design of bas-relief paintings on the walls can be found online to make it clearer what to paint in your home, so that the interior is living and beautiful, complementing the room. An inscription is also made or a letter is left as the author’s signature.
Volumetric paintings on the wall (video)
Volumetric paintings made of wood
Textured paintings on the wall made of wood look rich, but creating a three-dimensional picture will require not just skill, but also a lot of effort and time. The method of decorating the walls is unusual, and the work requires chisels, special knives, varnish, stain, and a wooden frame. The selected three-dimensional drawing must be transferred to the tree, and then begin cutting out the contours. The depth of the cut will create a three-dimensional picture. Due to the stain, an original look is obtained and the volume increases, and the finished painting is coated with varnish to protect it.

In this case, the painting does not require the additional use of accessories; you just need to cut out the drawing and hang it on the wall. This type allows you to create a modular design, for example, a triptych, but making the desired relief is very difficult. When finished, some people put glass in the frame. Before creating three-dimensional paintings from wood, it is better to watch a master class on cutting wood.
Volumetric decoupage
Decoupage is the easiest type of wall decoration; in addition, this technique allows you to decorate not only walls, but also other surfaces; even a beginner can carry out the work. The main advantage is the ability to make a flat element three-dimensional using available material. Creating volumetric decoupage requires the following:
- A piece of colored paper specifically for decoupage; you can use foil, wallpaper or photo wallpaper.
- Glue.
- Polymer material – clay.
- Napkin, textile, satin material.
- Brush.
- Scissors.

The step-by-step scheme of volumetric paintings for walls is as follows:
- The desired picture is cut out of paper or other material, you can use a stamp and print the picture.
- Next, the drawing is wetted in water and blotted with a cloth.
- On reverse side Glue is applied and firmly glued to the wall.
- Work is carried out similarly with other parts of the drawing so that the joints coincide and the integrity is not violated.
A three-dimensional drawing can be obtained by pasting the image again on top of the already finished drawing. At the very end, varnish is applied to the drawing. You can use corrugated cardboard, plasticine, paper tapes, non-woven or vinyl wallpaper, crepe or newspaper material, making a multi-colored and unusual design. You can cover any object, for example, a bottle, doors in bathrooms or bedrooms.
Advice! You can depict a winter garden, shells, salty seas. For the kitchen, a drawing of cereals, beans, or a simple cake on the wall is suitable. This is a budget design option for which you can take any household material that you have at home and use it to make the desired pattern, picture or drawing on the wall.
3d paper painting
Make paintings for interior walls paper is the cheapest. You can create a classic drawing step by step if you prepare:
- Paper.
- Scissors.
- Paints.
- Cardboard.
- Frame.
- Gouache.

You need to take the glass out of the frame and stick artificial or natural material. Jeans, braid, felt or paper are used. This will be the background that a person will look at. Next, a design is cut out of cardboard, after which it needs to be folded and slowly pasted onto the platform.
The right thing to do would be to paint some elements and let them dry before gluing them into a frame. Owls, roses, and peonies turn out well. The picture will be complemented by lace, weaving, rhinestones, beads, embroidery, leather, thread, sand, which can be glued to paste or PVA. The finished painting can be hung in the room in the desired place to complement the style.
Using any master class, you can decorate all the walls in the house, even if the room is small, the covering is old. Any product is good, the work does not take long and the wall partition is quickly decorated. Also, certain techniques can be used to create a postcard. An excellent plan is to use not ready-made three-dimensional paintings for the walls, but puzzles that, after assembly, are hung on the walls or polystyrene foam from which the picture is created.
You can complement voluminous wall paintings with lighting or a strip of LED strip. Volumetric drawings on the walls are suitable for any style, even if it is minimalism, where denim material looks great. You can depict your destiny in a painting if you have artistic creativity skills.
Photo gallery of three-dimensional paintings on the wall


The topic of this step-by-step master class- an extremely beautiful New Year's picture made of paper, which you can make with your own hands using the templates we provide. The soft lighting gives the painting a special charm. hidden between paper elements.
Tools and materials Time: 3-4 hours Difficulty: 6/10
- printer paper - 3 or 4 sheets (depending on how many layers you want to make);
- thick white paper according to the number of paper layers;
- corrugated cardboard;
- cutting blade;
- white glue;
- pencil;
- ruler;
- white acrylic paint and brushes;
- Printer;
- LED strip and power supply.
A DIY New Year's paper painting that works on the principle of the play of light and shadow is an original way to beautifully highlight your interior on the eve of the winter holidays!

This painting consists of several layers of paper, cut according to a pattern and placed in a thick frame at some distance from each other. On the back side the structure is illuminated by LED strip. Different layers of paper together create a landscape that is a play of light and shadow and turns the craft into a “magical” winter fairy tale!

If desired, the elements in the picture can be further “customized” and some “special” effects can be added that will make the image even more realistic!

Materials and tools:

Step-by-step instructions with photos
So, let's quickly get down to the creative part of our plan and an exciting activity, because as a result of the work, a wonderful decoration for the interior awaits us - a New Year's picture made of paper.
Step 1: Design
The first thing you need to do is prepare the design for the decoration you want for your painting. You can draw it or design it on your computer and then print it out. Since we are not very good at drawing, we chose the second option.
We decided to go with 4 separate layers, one of which would have a pattern of water reflected from top to bottom.
An important condition for this design should be the complete absence of “flying” objects: all your silhouettes should be attached somewhere in the scenery. For example, the last deer in our design is connected to the top of the bell tower; trees, snowman and deer are connected to the earth, etc.
Be sure to include frames of the same size on all layers to help hold everything together!
Be sure to put all the layers together before assembling and make sure that they fit together perfectly and all their parts are clearly visible (unless you want them to be visible). To differentiate them, we printed each layer in a separate color.

Below are the templates that you just need to download and print on your printer.
Template 1

Template 2

For pattern 3, you simply need to cut out half the sheet. Don't forget to leave a frame!
Template 4

When you're done preparing the layers, print them separately and transfer each one onto thick white paper. To do this, attach the printed layer to the window and place the paper on top. This way you can easily see and trace the contours of the landscape.

The third layer has simple geometric shapes, so we just held it with our free hand (see next step).
Step 2: Cut out the layers
Once you've finished tracing the outlines of all your layers onto the white paper, use a sharp utility knife to cut them out.

Initially remove the parts you no longer need. Cut them out slowly and carefully, trying to be as precise as possible.

Be careful with narrow seams in your design, as they can easily break or be removed by mistake. At this point, use a durable backing or some scrap surface that you don't mind scratching.

As you can see, our third layer is a regular rectangle with one half cut out and no design. This is because we wanted to create a water reflection effect in this area.

Here's how it works: this layer will be located behind the lake layer and before the last layer with the moon and the top-down design. The paper goes into the third hidden layer, but when the light is on, the reflection will appear on the top layer. The effect will be very soft, and the play of light will not be as pronounced as it would be otherwise.
The reason we cut out the first half of the layer is because we didn't want the moon to be bright, but later we realized that it could be cut out not at this level, but at the fourth one! You see, our New Year's paper painting has already gradually begun to take on beautiful shapes and silhouettes.

Step 4: Glue the Layers Together
Now you need to cut out some cardboard spacers to create space between each layer for the light.
Cut individual strips of cardboard to the length and width of your frame. Alternatively, you can make entire cardboard frames to fit your frame for each layer separately. The second option requires large pieces of cardboard, so we used the first. In any case, make the width of the frame somewhat thinner than the frame in paper layers, and then your cardboard will not be noticeable from the side in the finished craft.

Glue strips of cardboard around the back of the first layer.

After this, attach the second layer on top of the strips, on the front side of the cardboard frame.


Repeat steps until you have glued the fourth layer.


As you can see. It is precisely due to the multi-layering that our New Year's paper painting looks like a three-dimensional 3D image.
Step 5: Make a Frame
Now you need to beautifully design the landscape. Of course, you can use a pre-made frame, but we'll show you how to make your own!
To make the frame, cut 4 wide strips of cardboard the same width and length as your craft. These strips should be slightly wider than the thickness of the layers, since you need to save some free space on the wrong side for the LED strip.

Measure the thickness of the cardboard at one end of each strip and draw a line.

Using a cutter, carefully cut out this piece, but make sure that the bottommost layer of cardboard remains intact.

When you've finished doing this on all the strips, apply a little glue to the cardboard layer at the end of the strip and attach the second strip perpendicularly to it.

Do this with all 4 strips to create a rectangle.

This is a simple trick to hide edges and make your work more aesthetically pleasing.
Step 6: Make the Back and Frame
To make the back, simply cut a rectangle of cardboard the length and width of your frame.

Paint this piece of squirrel with paint or cover it with a piece of paper (like we did).

To make our New Year's paper picture look complete, we need a frame. So we drew a new frame on a piece of cardboard measuring the length and width of the painting. This cardboard was already white, but you can paint it if you want.

Step 7: Paste the Landscape into the Window
Apply a little glue around the inside of the frame and carefully press the landscape into it. Slowly lower the landscape down until it reaches your desired position.

We placed our New Year's paper picture a little away from the top of the box so that there was free space between the frame and the first layer.

Cut a small slit in the back of the box for the cable to fit through the frame. Try to make it closer to one of the corners.

Don't forget to glue a cardboard frame to the top of the window to complete your shadow painting!
Step 8: Add LED Strips
Measure inner part boxes around the perimeter and cut a piece of LED strip according to measurements. Apply the tape to the inside of the window, starting from where you made the cut.
Connect the strip to the power source using an adapter or welding.

Place the back of the frame back in the box with the white side facing in so you won't be able to see any brown spots through the cut layers. The back fits perfectly into the box, staying in place when closed, and you can remove it whenever you want.

Step 9: Light!
Turn on LED strip plug in and admire the amazing result! Thanks to the thick white paper and the space between each layer, the light bleeds through the layers very nicely!

Your DIY New Year's paper painting is ready! How do you like her? You can not only use our templates. but also choose your own. Let us know in the comments what you did. Merry Christmas and Happy New Year to you!

If you liked creating this New Year's paper picture, then here is a video with another good creative idea: